Deploying Django on AWS Elastic Beanstalk
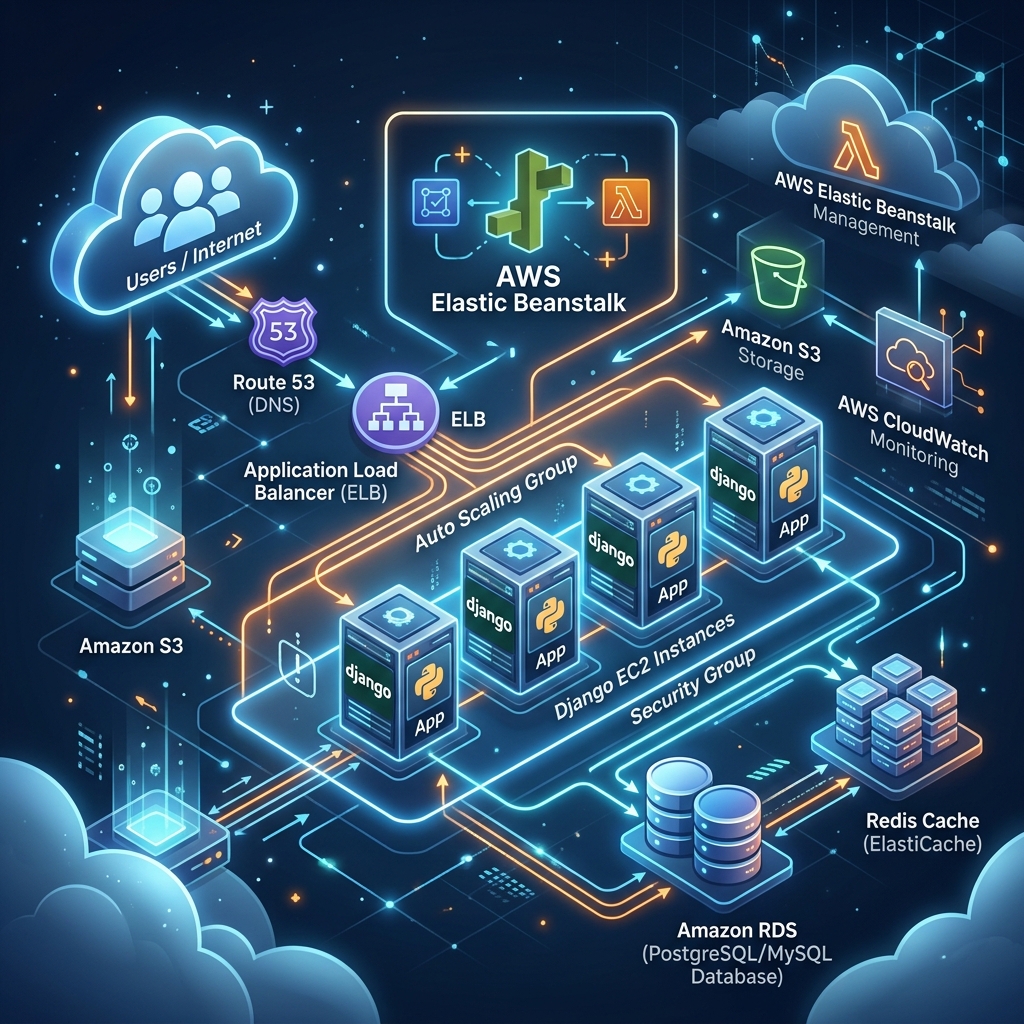
AWS Elastic Beanstalk simplifies the deployment process by handling infrastructure provisioning and load balancing for you. Here is how to easily deploy your Django app.
Prerequisites
- An AWS Account
- Python and Django installed locally
- EB CLI (Elastic Beanstalk CLI) installed
Step 1: Initialize Your Django Project
django-admin startproject myproject
cd myproject
python manage.py migrate
Step 2: Configure requirements.txt
Elastic Beanstalk uses this file to install your Python dependencies.
pip freeze > requirements.txt
Step 3: Set Up .ebextensions
Create a folder named .ebextensions in your project root and add a django.config file.
option_settings:
  aws:elasticbeanstalk:container:python:
    WSGIPath: myproject.wsgi:application
Step 4: Initialize Elastic Beanstalk
Use the EB CLI to initialize the application in your directory.
eb init -p python-3.9 my-django-app --region us-east-1
Follow the prompts to configure your environment.
Step 5: Create EB Environment
Create an environment and deploy your project.
eb create my-django-env
This command provisions an EC2 instance, sets up the security groups, and runs your app.
Step 6: Connect a Database (AWS RDS)
Instead of using the default SQLite, it's highly recommended to use Amazon RDS for production.
- Go to the AWS Management Console > RDS.
- Create a PostgreSQL database.
- Update your
settings.pyto point to the new RDS endpoint using environment variables.
Step 7: Environment Variables
You can set environment variables securely using the EB CLI.
eb setenv DJANGO_SECRET_KEY='your-secret-key' DB_HOST='your-rds-endpoint' ...
Step 8: Open Your Application
Once changes are applied, run:
eb open
✅ Done
Your Django application is now scalable and smoothly running on AWS Elastic Beanstalk!